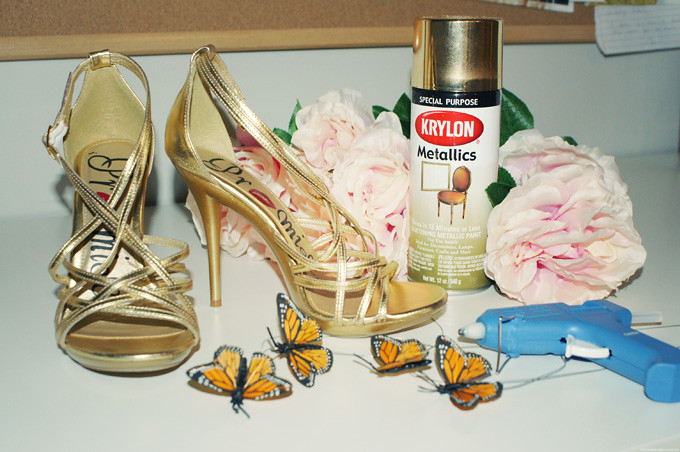
What you will need...Gold strappy heels (courtesy of GoJane.com)Gold metallic spray paintSilk rose flowersMonarch butterfliesGlue gun & glue


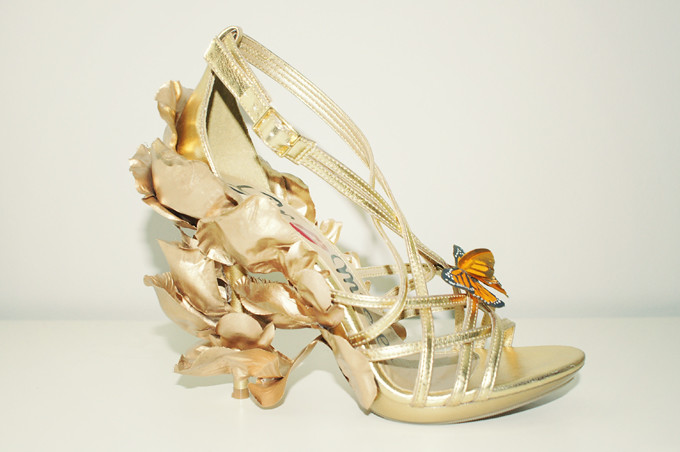
DIY Alexander McQueen SS11 Monarch Shoes
How-to:
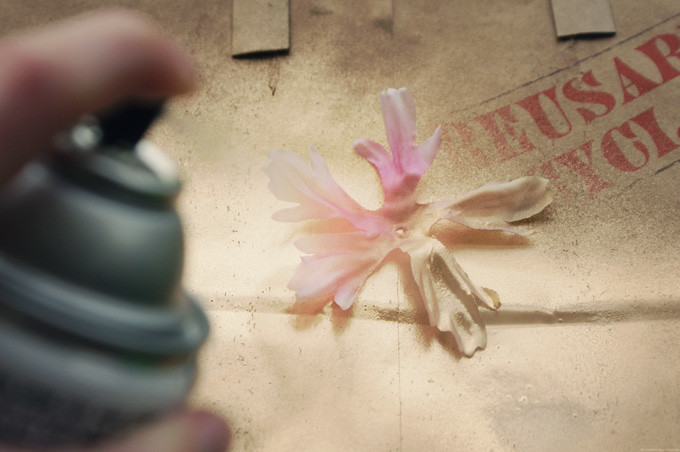
2. Cut the petals apart.
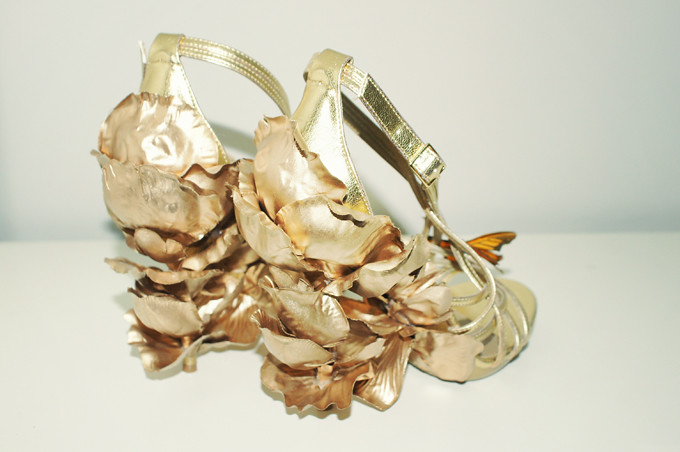
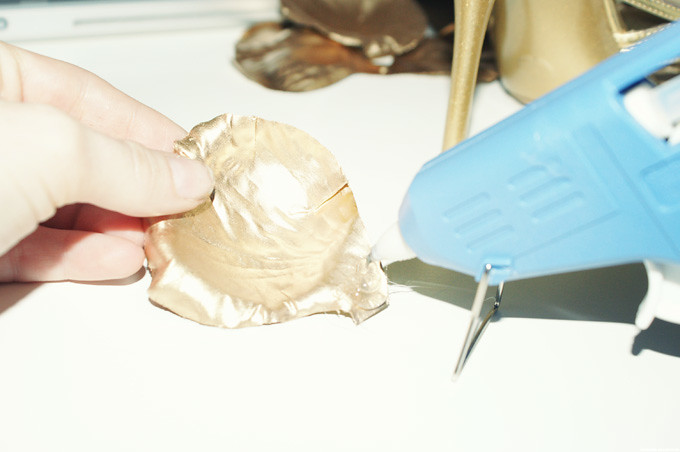
3. Begin gluing the gold petals onto the heel. GoJane.com graciously sent me these gold strappy heels for the project - get them here. The key when adding the petals is symmetery. Either glue the petals directly down the middle of the heel or a pair mirroring each other center on the back of the heel.
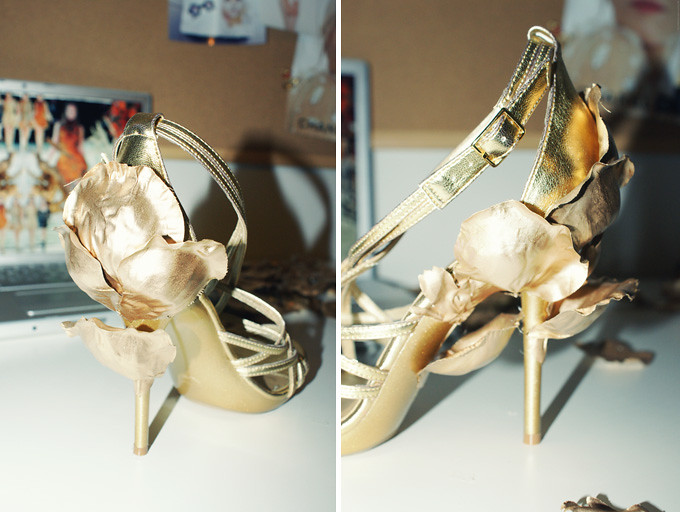
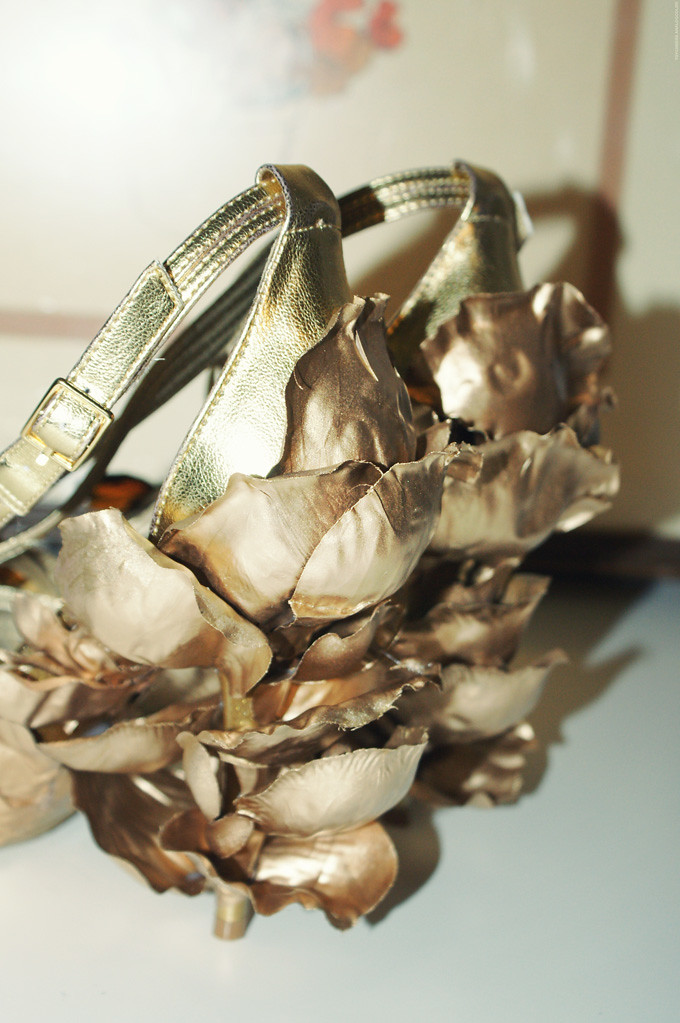
4. Continue layering the petals down the heel.
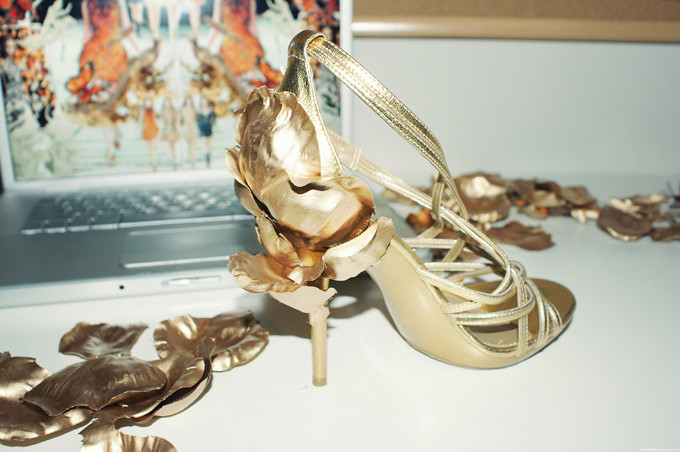
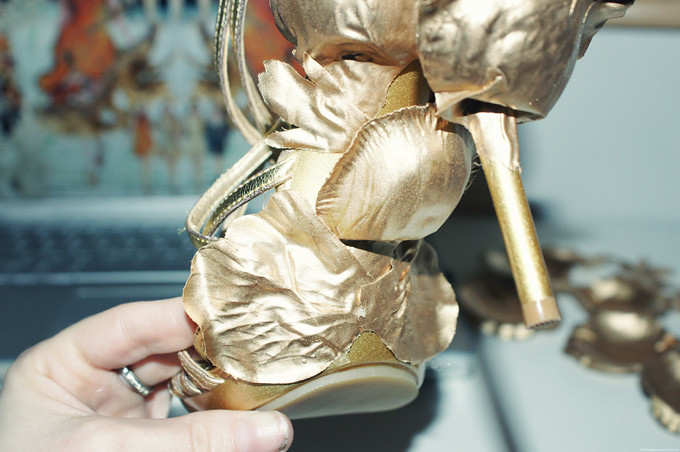
5. Add gold petals to the underneath of the shoe's arch until you have the coveted Alexander McQueen look.
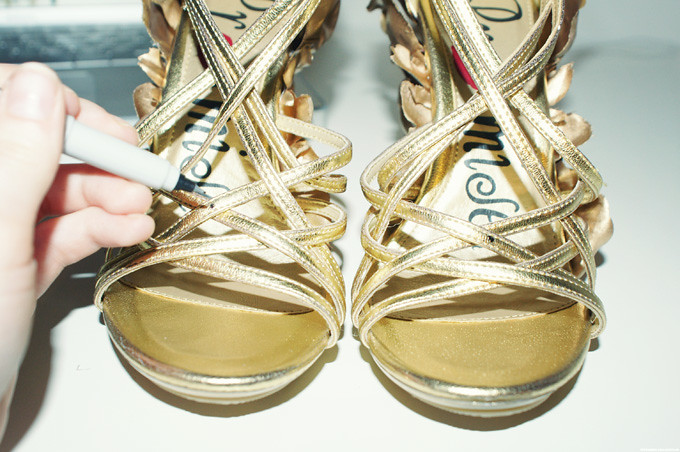
6. Using a marker, symmetrically dot where the Monarch butterflies will be placed.
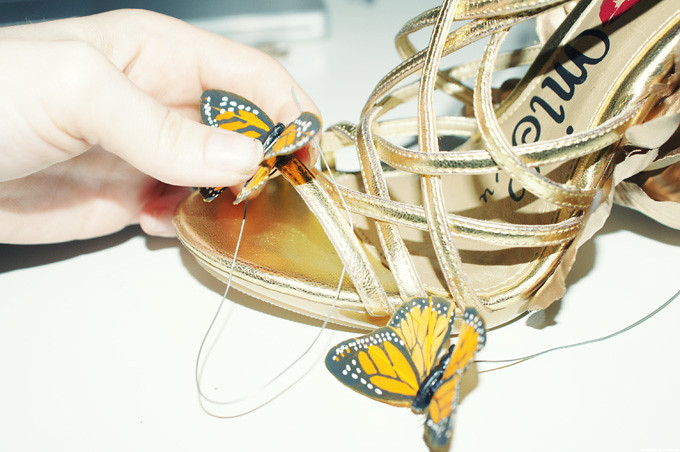
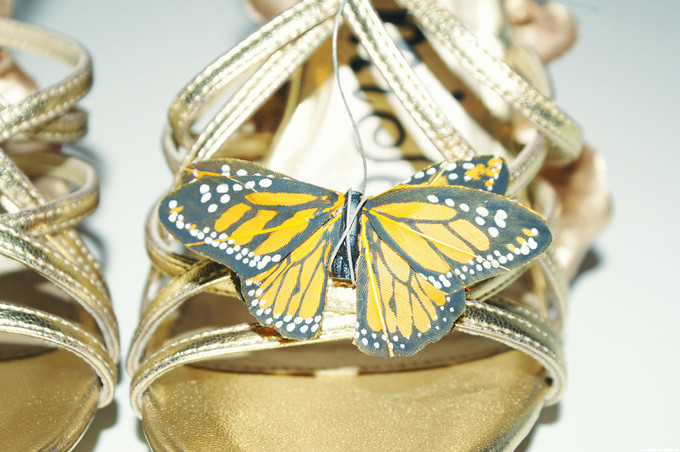
7. The monarch butterflies I stumble upon in the craft store just so happened to have wires already attached, so I simple wrapped the wire around twice & snipped off the extra wire. If you don't find butterflies with the wire, simply glue them in place. Then, wrap a little wire around the body to secure it in place. Optional: I added two butterfly wing to each butterfly, so the butterfly had a total of four wings. I simply tore a pair of wings off one butterfly & glued them onto the other butterfly, just below its set of wings to match the shoe exactly.
8. You're Finished!
An outfit post of me prancing around in my new creation will be up just as soon as the string of thunderstorms floats past Uptown & the sun shows her face again. Weather.com prediction
 |
Tweet |


7 comments:
gorgeous DIY!
thanks for sharing!
You are pretty amazing!
what a brilliant, creative idea! i will definitely look into finding all the necessary materials.
http://dallianceswithsuitsandskirts.blogspot.com/
AMAZING! This is a brilliant tutorial. Love the final product.
this is awesome! love it!!! now if only i had enough patience to do this..
wow, it was so brilliant! xoxo
Fabulous! I love! I found your blog by chance .....
I also do DIY, I'll leave the link if you want to see ...
http://www.desdetenerifeconamor.com/
Post a Comment