 1. You will need the ToyCamera AnalogColor application -- available for PC and Mac -- and a simple photo editor or Photoshop.
2. Open ToyCamera AnalogColor. Drop and drag your photo onto the empty space.
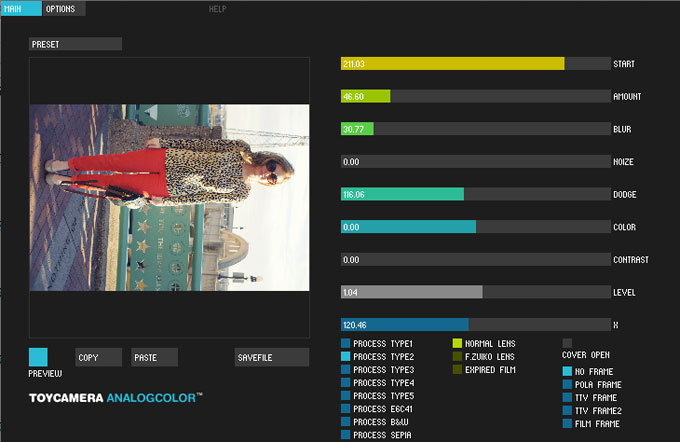
3. Select PROCESS TYPE 2 and NORMAL LENS and NO FRAME.
4. Adjust your settings to about these amounts:
START: 211You can adjust these settings depending on the lighting of the original photo...
AMOUNT: 47
BLUR: 31
NOIZE: 0
DODGE: 116
COLOR: 0
LEVEL: 1.04
X: 121
 5. When you're happy with your image, click SAVEFILE. Usually the photo is saved under a different filename in the same location to original photo is stored.
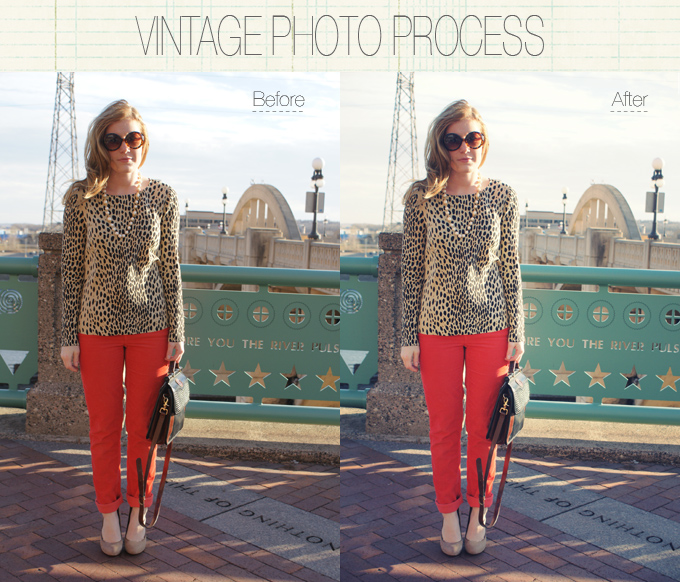
6. Open you image in Photoshop or any simple photo editor. Rotate your photo to the proper layout. Save. Then resize as needed. That's it!
Play around with the presets, settings, process types, lens, and frames to get photo effect for your photos... Have fun!


 |
Tweet |


No comments:
Post a Comment